Online Demo - Printer Setup on Primary Print Release Station
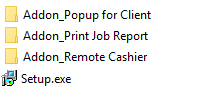
Step 1. Download and extract the 30-day trial version of PrintLimit Print Release Station, then double-click setup.exe to install Primary Print Release Station.
On
the computer (for example, \\PRS) where Primary Print Release Station is installed:
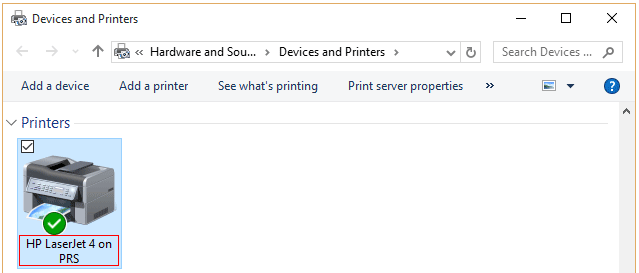
Step 2. Click Start --> Settings --> Devices and Printers.
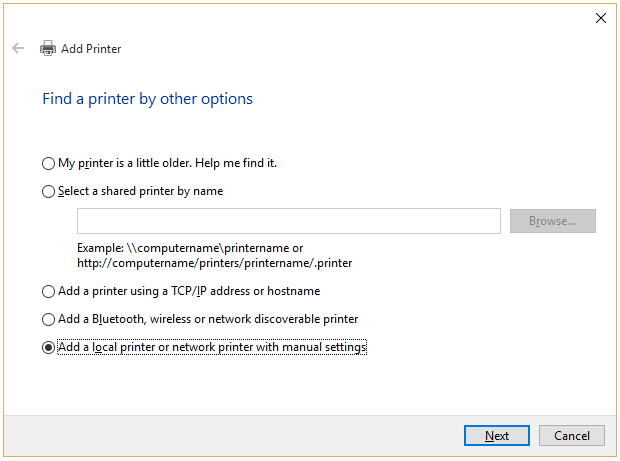
Step 3. Click "Add a printer" button to start the Add Printer Wizard, and then click Next.
Step 4. Click the "Add a local printer or network printer with manual settings" option and then click Next.
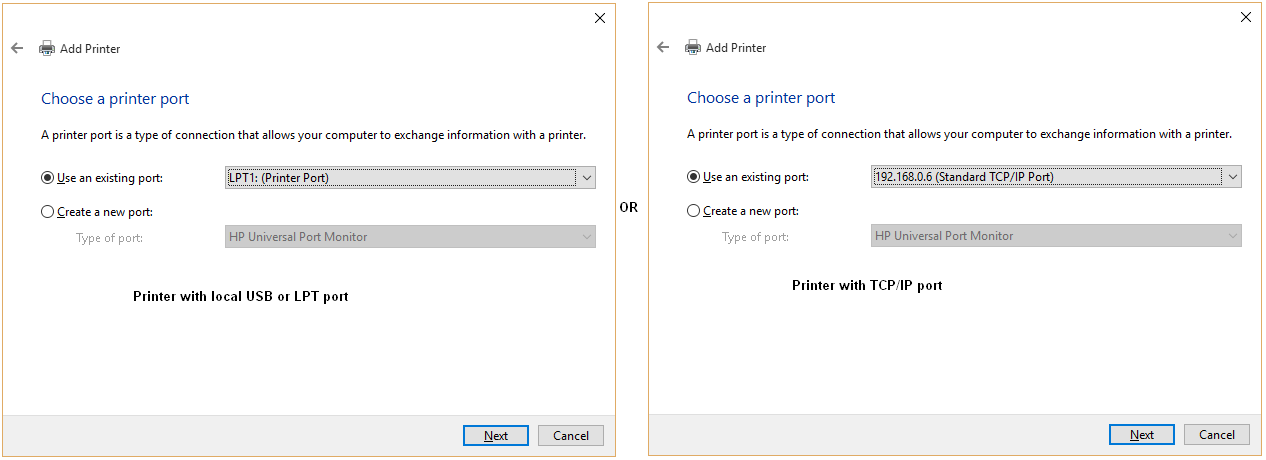
Step 5. Select a port, for example, Standard TCP/IP Port, Parallel/USB port or LPR Port and follow the instructions on the screen. If the port is not in the list, select "Create a new port" to add a new port, then follow the on-screen instructions.
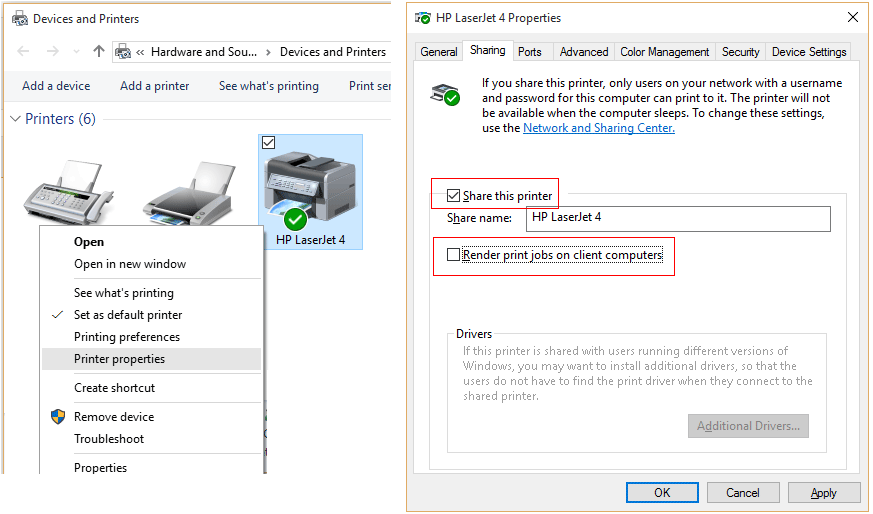
Step 6. In "Devices and Printers", right-click the printer icon and click Printer properties, share the printer and uncheck "Render print jobs on the client computers".
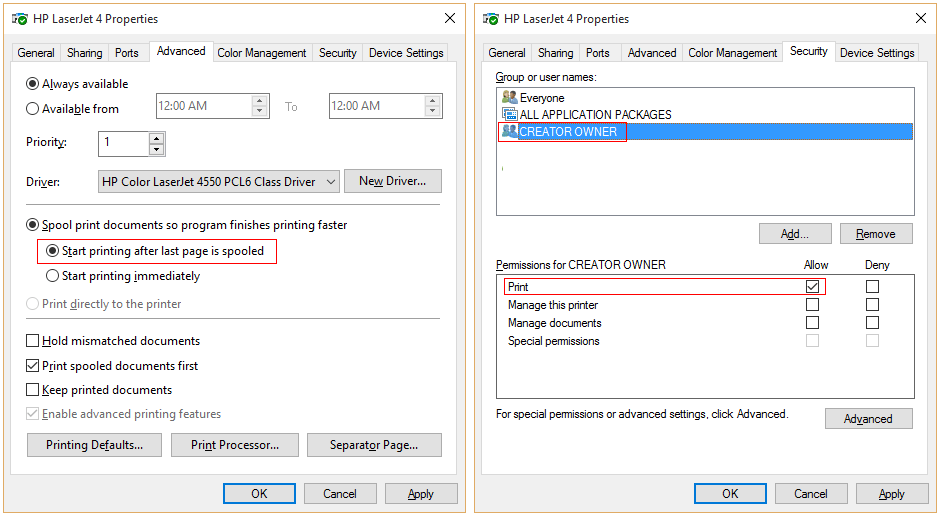
Step 7. Select "Start printing after the last page is spooled" in "Advanced" tab and assign “CREATOR OWNER” only “Print” permission in the “Security” tab.
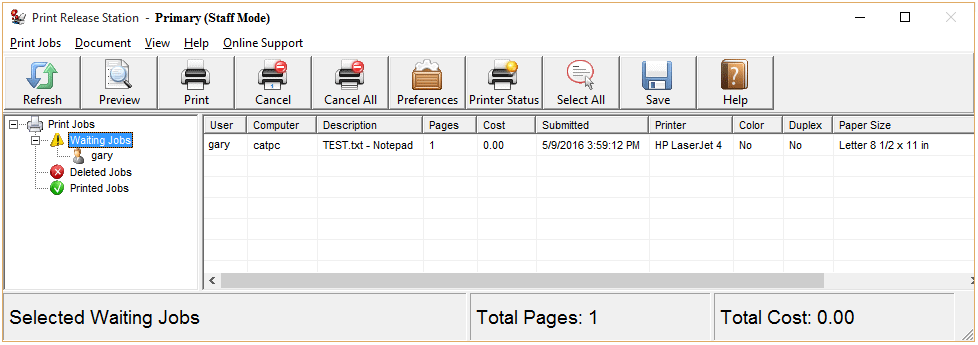
Step 8. Click Start -> All Programs -> PrintLimit -> PrintLimit Print Release Station - Primary to run Primary Print Release Station for the first time. If Preferences window doesn't appear, click menu Print Jobs -> Preferences. Click Refresh List, select the printers you want to control in the list of Shared Printers and click Add to add it to the list of "Monitored Printers", click Save, and then click Exit.
On each workstation:
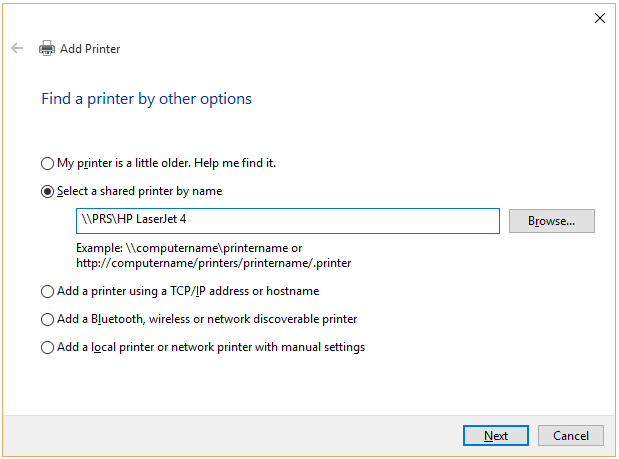
Step 9. On each workstation that you want to control the print jobs, add shared printer, e.g., \\PRS\HP LaserJet 4 (\\PRS is the computer that has Primary Print Release Station installed):
9.1 Choose Start -> Devices and Printers.
9.2 Click "Add a printer" button to start the Add Printer Wizard, and then click Next.
9.3 Click the "Select a shared printer by name" option and follow the instructions on the screen.
9.4. The printer icon will be added to the Devices and Printers. The network printer name is like "Printer-Name on Print-Release-Station-Computer-Name".
Step 10. Print a document from a workstation. The print job is held in Primary Print Release Station -> Waiting Jobs. Click the Print button to release it. There are different ways to release print jobs, for example, users must enter user ID to show only their print jobs on the screen, then enter the password to release the print jobs. Please see Scenarios for more details.
